> ## Documentation Index
> Fetch the complete documentation index at: https://docs.apigo.ai/llms.txt
> Use this file to discover all available pages before exploring further.
# Claude Code
> Use Claude models in Claude Code through an Anthropic-compatible proxy.
> Use Claude Code with your platform's Anthropic-compatible proxy.
## Install Claude Code
**macOS, Linux, WSL:**
```bash theme={null}
curl -fsSL https://claude.ai/install.sh | bash
```
**Windows PowerShell:**
```powershell theme={null}
irm https://claude.ai/install.ps1 | iex
```
**Windows CMD:**
```bat theme={null}
curl -fsSL https://claude.ai/install.cmd -o install.cmd && install.cmd && del install.cmd
```
**macOS, Linux:**
```bash theme={null}
brew install --cask claude-code
```
**Windows:**
```powershell theme={null}
winget install Anthropic.ClaudeCode
```
For more installation options and version notes, refer to the [official Claude Code setup guide](https://docs.claude.com/en/docs/claude-code/setup).
## Configure your platform API
> **Important:**
> Before configuring, clear the following Anthropic-related environment variables so old values do not override your platform settings:
>
> * `ANTHROPIC_BASE_URL`
> * `ANTHROPIC_AUTH_TOKEN`
## Choose an integration method
`@apigo/vibe-coding` corresponds to the interactive terminal tool **Agent CLI Switch**. This flow writes Claude Code settings for you directly.
Follow the flow shown in the screenshots:
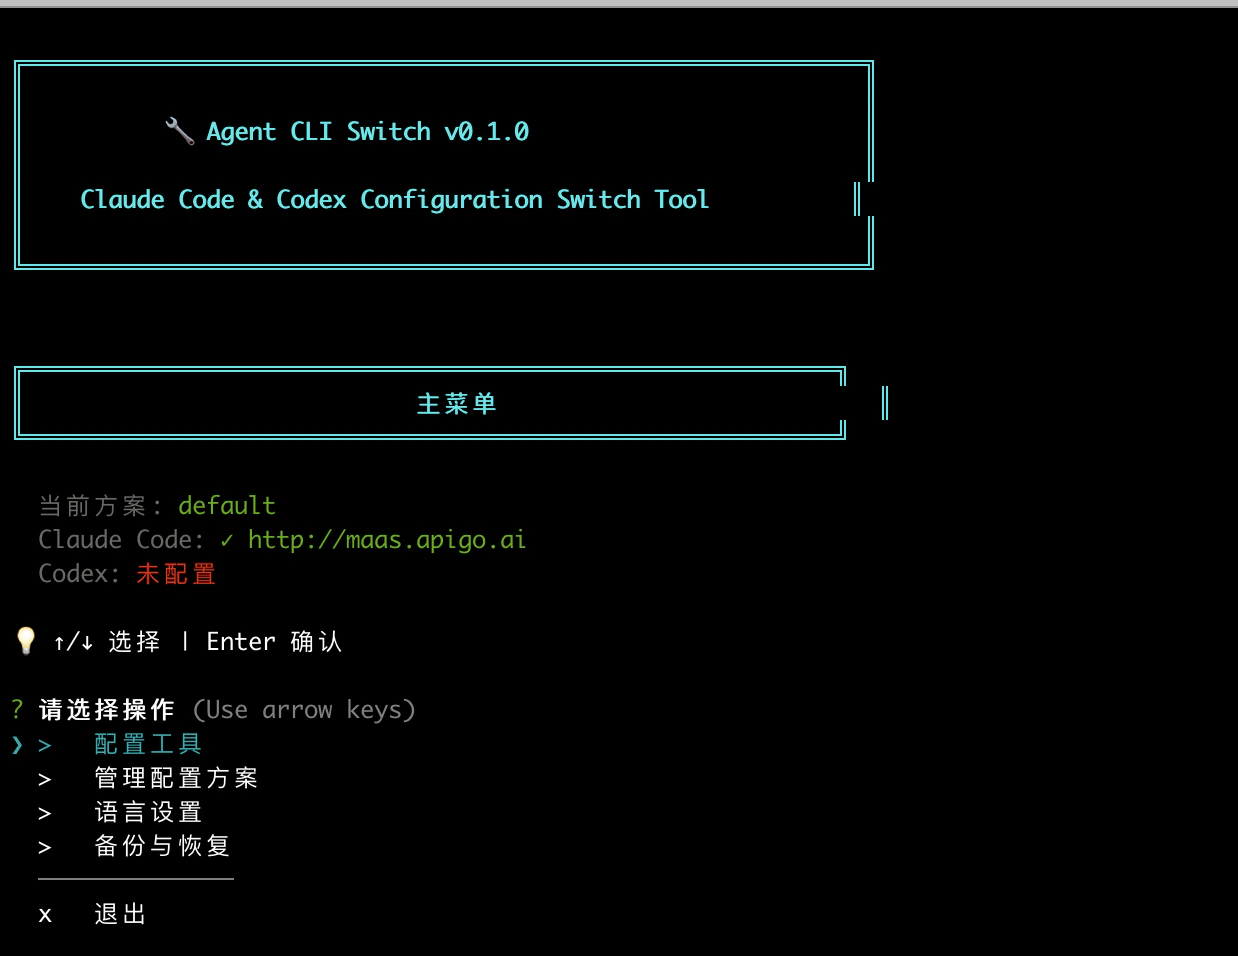
1. Open **Agent CLI Switch v0.1.0**.
2. In the **Main menu**, choose **Configure tools**.
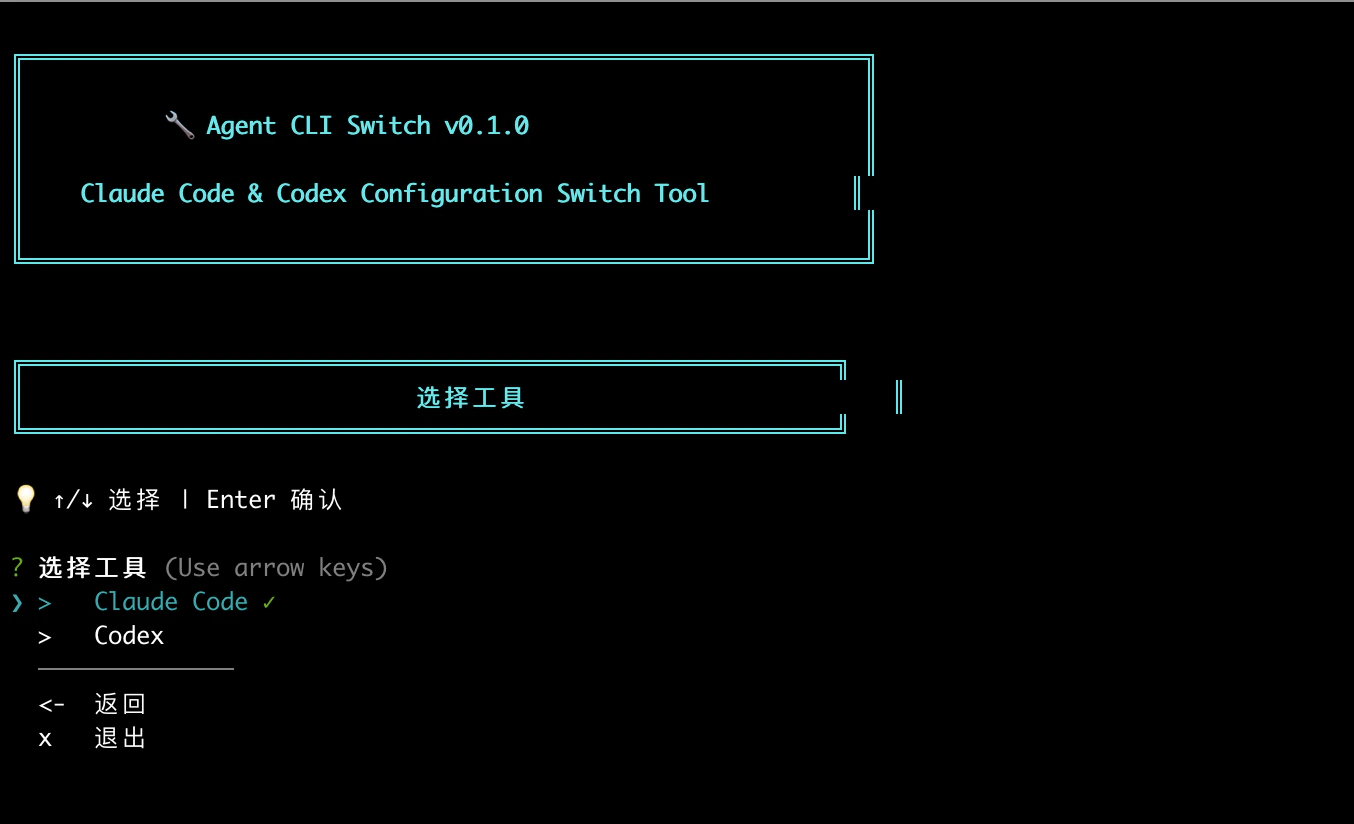
 3. In **Select tool**, choose **Claude Code**.
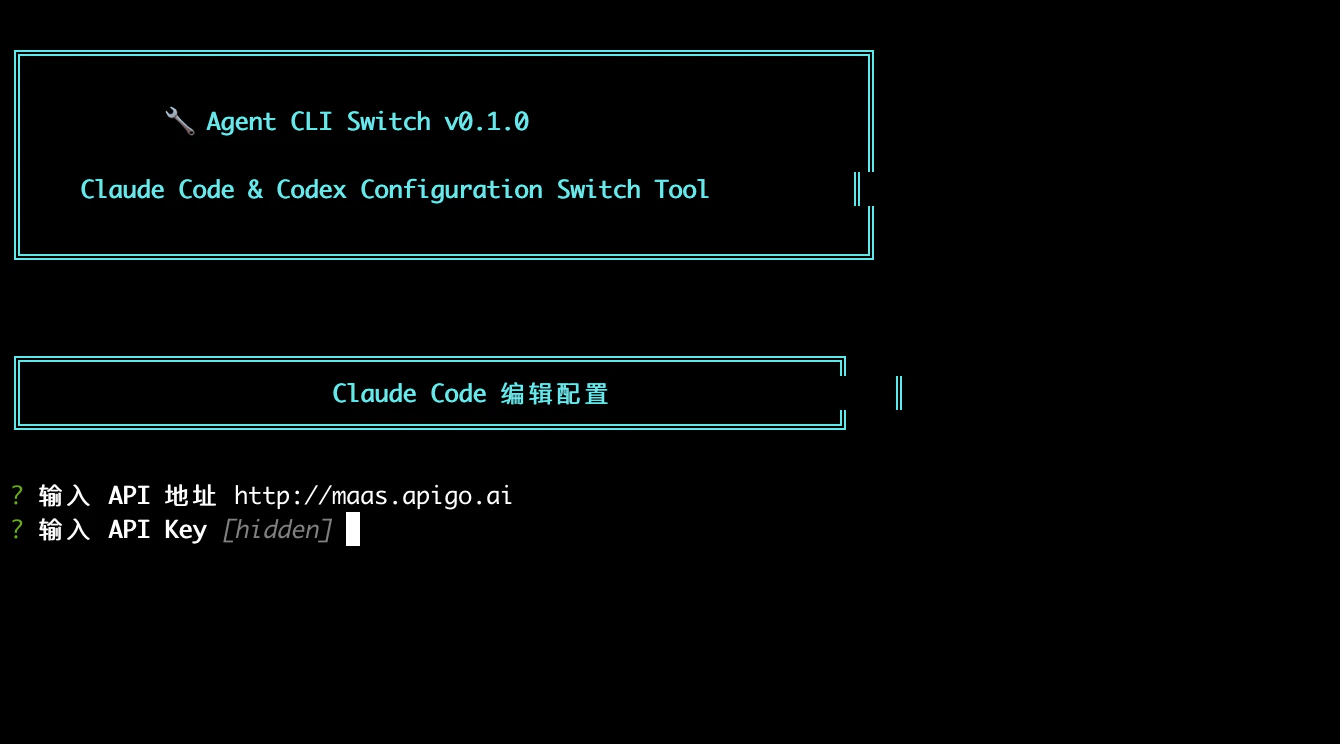
 4. In **Claude Code edit config**, enter:
`API URL`: `https://maas.apigo.ai`
`API Key`: your ApiGo key
4. In **Claude Code edit config**, enter:
`API URL`: `https://maas.apigo.ai`
`API Key`: your ApiGo key
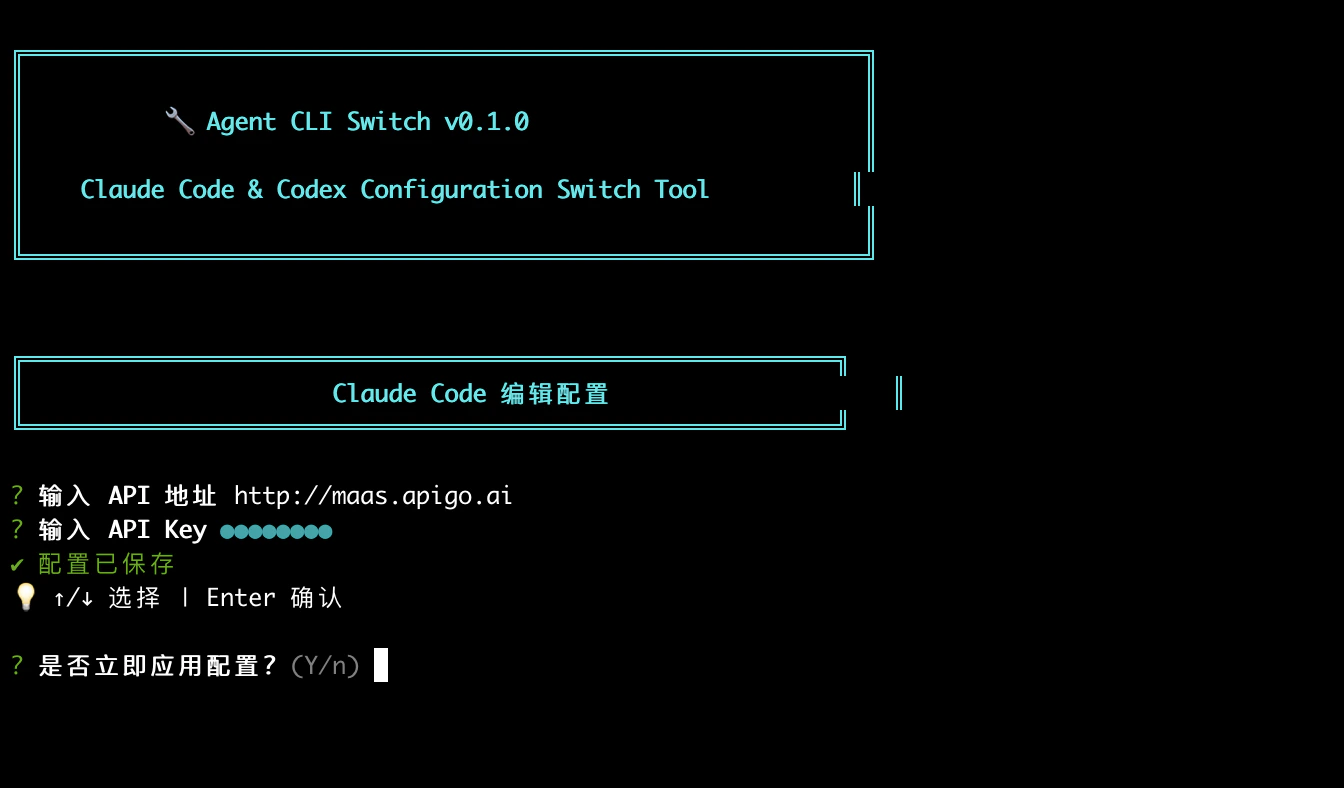
 5. After you see the config-saved prompt, choose to apply the configuration immediately.
 After that, run `claude` to use Claude through ApiGo.
Edit or create Claude Code's configuration file:
* macOS & Linux: `~/.claude/settings.json`
* Windows: `%USERPROFILE%\.claude\settings.json`
Replace the placeholders below with your platform values:
* `APIGO_API_KEY`: your platform API key
```json theme={null}
{
"env": {
"ANTHROPIC_BASE_URL": "https://maas.apigo.ai",
"ANTHROPIC_AUTH_TOKEN": "APIGO_API_KEY"
}
}
```
With those two variables set, Claude Code will send Claude requests through your platform. No extra model-related fields are required.
Then edit or create `~/.claude.json`:
```json theme={null}
{
"hasCompletedOnboarding": true
}
```
> Note: Environment variables `ANTHROPIC_AUTH_TOKEN` and `ANTHROPIC_BASE_URL` take precedence over the configuration file.
## Launch Claude Code
After configuration, navigate to your project directory and run the `claude` command in the terminal to launch Claude Code.
## Trust folder
After launching, select **Trust This Folder** to allow Claude Code to access files in that folder, then start using Claude through your platform proxy.
After that, run `claude` to use Claude through ApiGo.
Edit or create Claude Code's configuration file:
* macOS & Linux: `~/.claude/settings.json`
* Windows: `%USERPROFILE%\.claude\settings.json`
Replace the placeholders below with your platform values:
* `APIGO_API_KEY`: your platform API key
```json theme={null}
{
"env": {
"ANTHROPIC_BASE_URL": "https://maas.apigo.ai",
"ANTHROPIC_AUTH_TOKEN": "APIGO_API_KEY"
}
}
```
With those two variables set, Claude Code will send Claude requests through your platform. No extra model-related fields are required.
Then edit or create `~/.claude.json`:
```json theme={null}
{
"hasCompletedOnboarding": true
}
```
> Note: Environment variables `ANTHROPIC_AUTH_TOKEN` and `ANTHROPIC_BASE_URL` take precedence over the configuration file.
## Launch Claude Code
After configuration, navigate to your project directory and run the `claude` command in the terminal to launch Claude Code.
## Trust folder
After launching, select **Trust This Folder** to allow Claude Code to access files in that folder, then start using Claude through your platform proxy.